
Installation
Hello and welcome!
This updated installation page supplements and improves our printed instructions
Product Installation Sheet Convenient Height PDF downloadable file
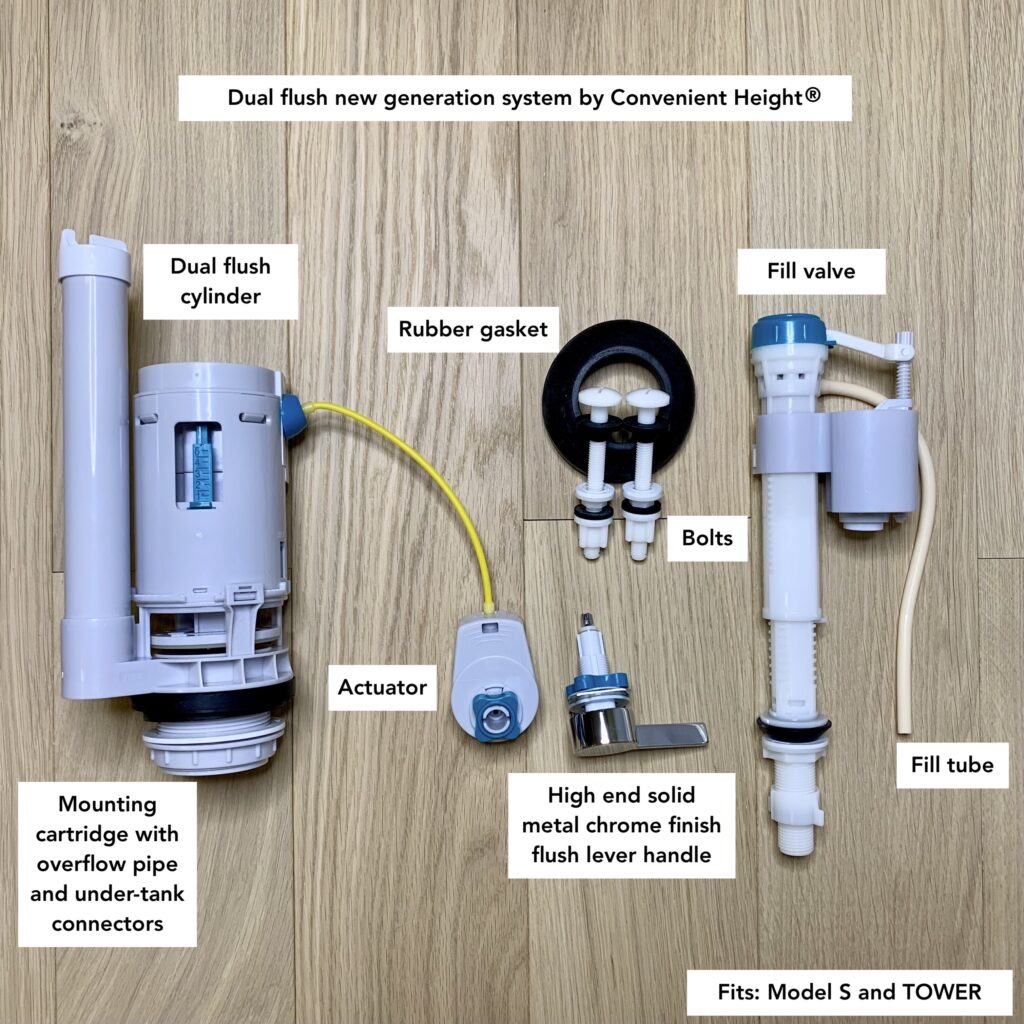
Elements 1 – 7 below are dual flush valve + fill valve assembly highlights

- (Element One) Flush lever handle to allow two directional movement once connected to the actuator. Lever dual flush functions are: lift handle up for less water and press down for a full flush. Ensure the up/down motion of the handle as lever metal key rod is inserted into the actuator. The handle remains horizontal once connected to the actuator.
- (Element Two) Placement line up of the large metal bracket direct to porcelain, followed by a rubber washer and a slim white washer. Tighten all three with the large blue spinner. Followed the step (1) the actuator blue spinner secures the handle to the actuator.
- (Element Three) Yellow cord to remain minimally bent. Yellow cord housing protects a metal wire inside. Metal wire should move freely within its yellow protective housing when flush lever handle is pressed up and down.
- (Element Four) The fill valve tube remains clear of the fill valve float rising during water fill and during flush.
- (Element Five) Dual flush valve cylinder locks into the flush valve bracket. Position cylinder as shown
- (Element Six)The tank to bowl connector bolt remaining visible ensures valve bracket stays level. Visually the overflow tube should not block or interfere with the tank to bowl connector bolt
- (Element Seven) Overflow tube positioning as shown for no interference with the tank to bowl connector bolt.
Tank to bowl Connector bolt element line up

Sequence of tank to bowl connector screws (shown above). We supply a set of rust-proof heavy-duty nylon bolts for the tank to bowl connection. The great advantage of these (in addition to rust-proof material) is their partial flexibility. While some plumbers will always prefer metal screws, we see rust-proof heavy-duty nylon bolts as the new generation two-piece toilet tank-to-bowl connecting parts. The main large cone-shaped rubber piece will always go inside of the tank to hold the water from seeping through. Please see the #A diagram attached here below, called the “original”, because that is the sequence of how the screw parts will be aligned as they arrive to you.
Go to the TOILET SEAT INSTALLATION

INSTALLATION VIDEOS
Video #1: Assembling tall toilet. This 15 minute video covers multiple details: a) assembling the tank (see Video #2 below for detailed instructions of connecting actuator to the handle/lever correctly; b) installing tank to bowl connectors and a rubber gasket; c) mounting the tank onto the bowl. Process covered in both video #1 and video #2 (see below) should take 1 hour.
Video #2: How to correctly connect dual flush actuator to the handle. The flush handle (lever) must perform a Dual action: handle up for less water, handle down for a full flush. There is only one way to connect the actuator to the handle correctly (and 2 ways to do it incorrectly).
If you need installation advice, please call 617-419-0814 (M- F 9am – 4pm EST)
Non-Electric Bidet Toilet Seat Installation

Toilet Bidet Installation


